 |
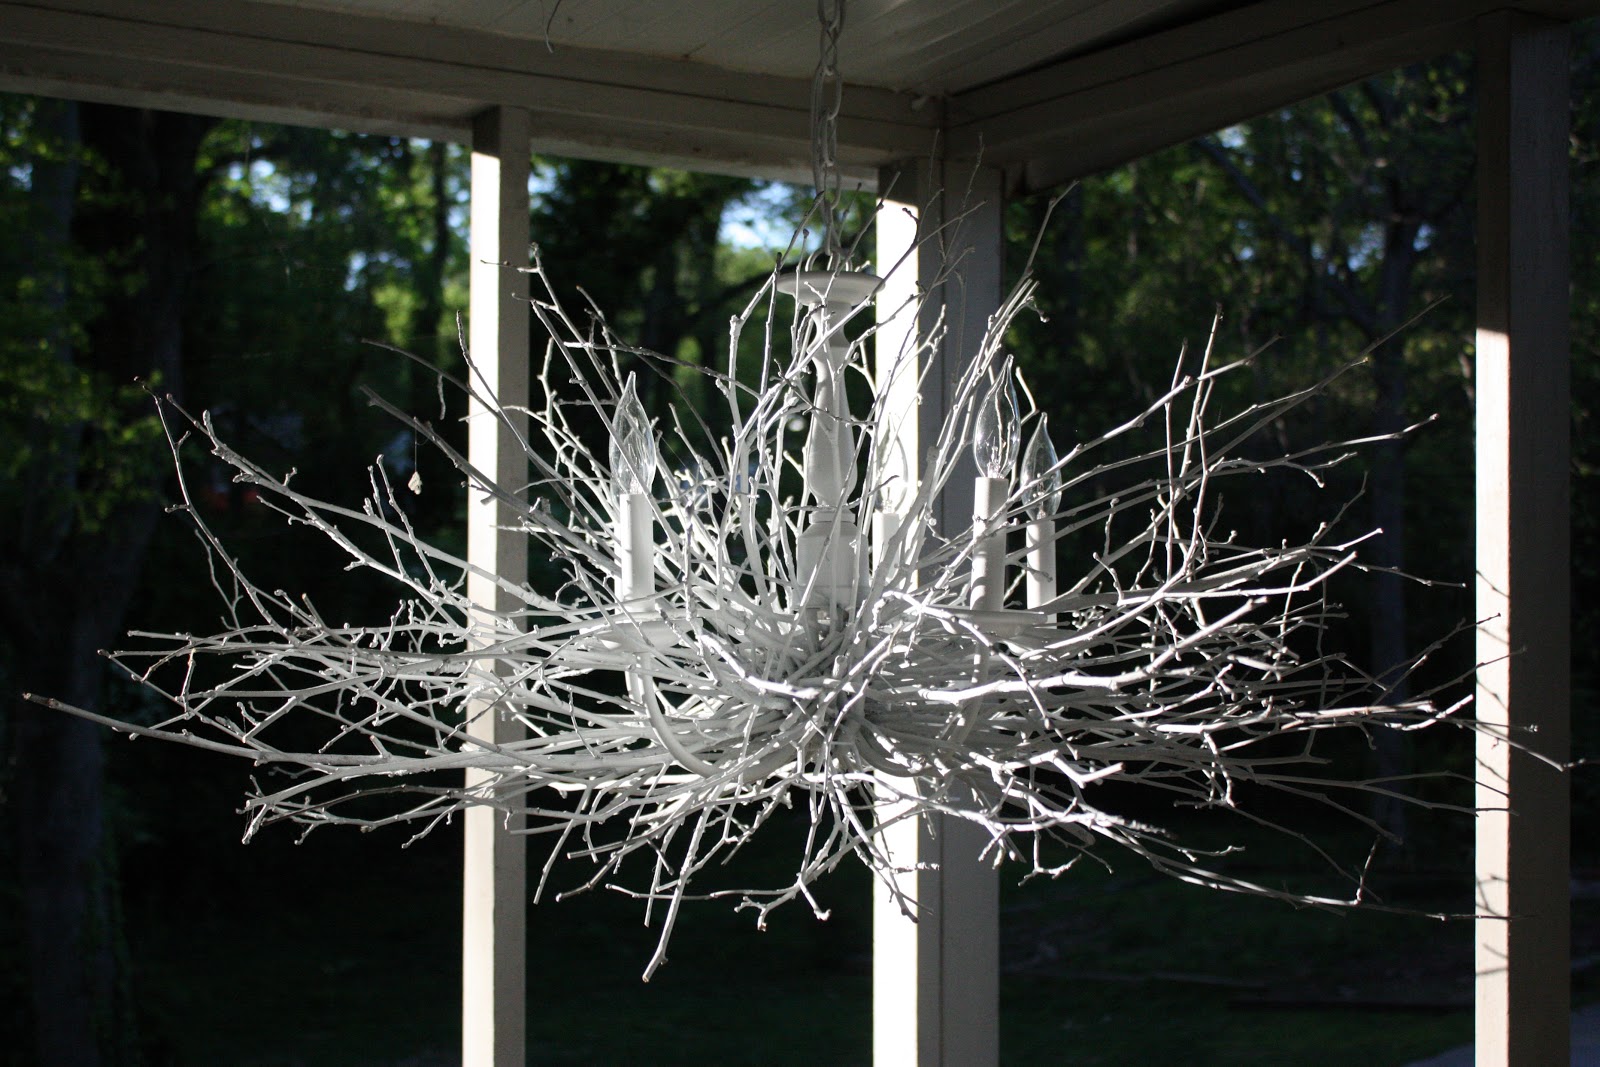
| Completed branch chandelier |
Materials:
1. Sticks (thankfully my neighbors cut down some trees so I just snipped about 50 branches from their tree)
2. White stray paint (silver or gold)
3. Molding wire
4. Hot glue gun
I'm a thrifter...whether in Target or a Goodwill, I'm always looking at how I can take something and turn it into something else (yes I recognize it's a personal problem). While at a local thrift store I found this little chandelier for $10 and couldnt pass it up. I snatched it up before I even had the idea of creating a chadelier, then let me little brain do all the work.
 |
| Local thrift shop find= $10 |
Like I said earlier, my neighbors had recently cut down a few trees so I just cut a bunch of branches from their trees. The first step is to start placing all of the branches starting from the center out and attaching to the chandelier using molding wire.

Once you have wired a good number of branches into the chandelier (like pictured above), start hot gluing the end of the branches into the chandelier. Also, as a helpful hint, I think its easier to see the progress once you have spray painted the chandelier. So I spray painted the newly added branches every so often.

Continue wedging/gluing/shaping up the chandelier until you have the outcome that you want.

This could also be either dusted with gold/silver spray paint to give it a sheen or painted solid silver/gold...both would also look awesome.
AND here is my final project. I LOVE LOVE LOVE IT! It's perfect for a breakfast nook, an office, bedroom or dining room.

 |
| The bottom |
 |
| This chandelier required 40W bulbs found at Home Depot |
Happy DIYing everyone!
Love your blog :) I started one this past summer for school stuff... Totally dropped the ball and took a 7-month break. Whoops!
ReplyDeleteAnyways, you need to make "following" within blog sites an option so I can keep up with your adorable crafts.
Hope all is well with you and Nathan :)
For an outdoor kitchen this is a great idea.Love it.
ReplyDeleteThis is incredibly beautiful and simple and LOW cost. Thanks so much.
ReplyDeleteInitial You got a awesome blog. I determination be involved in plus uniform minutes. I view you got truly very functional matters. I determination be always checking your blog blesss.
ReplyDeleteWow! Such an amazing and helpful post this is. I really really love it. It's so good and so awesome. I am just amazed. I hope that you continue to do your work like this in the future also.
This is an awesome motivating article.I am practically satisfied with your great work.You put truly extremely supportive data. Keep it up.
Wow, cool post. I'd like to write like this too taking time and real hard work to make a great article but I put things off too much and never seem to get started. Thanks though.
I really appreciate this wonderful post that you have provided for us. I assure this would be beneficial for most of the people. chandeliers
I would like to say that this blog really convinced me to do it! Thanks, very good post. 여유증
ReplyDeleteOne advantage of ceiling basket designs of crystal chandeliers is its availability in various sizes that will fit perfectly with any home architecture. modern entryway chandelier
ReplyDelete